I've always been an advocate of the 3 R's - Reduce, Reuse, Recycle, as some of my old classmates may (not so fondly) remember. Three months ago, while we were packing for our move, I found this old book I made about myself for a school project.


I showed it to KT and he said, "so you've always been like this; you really haven't change one bit." HAHA!
For one of the many science projects I've done for school, I had decided to make my own compost. If memory serves me correctly, I built a monstrosity in the backyard. Now that I'm older and wiser, I'll start with a smaller compost pile.
Since we've been so busy in the house, we haven't gotten around to doing anything in the backyard. There are three projects that are on the top of my list for the backyard. First, make a rain barrel. If you look into buying one, then you would know how insanely expensive they are - especially one that is not an eyesore. Second, harvest grey water. Not too sure how I'll be doing this yet. And Third, make my own compost.
In the last week or so, I've been really itching to get my compost started. I started putting aside strawberry heads with stems, banana peels, and laundry lint. KT saved his peanut shells for me. As these items started to really break down in their temporary containers, KT donated one of his plastic bins for me to finally start the compost pile.

I used the the US Environmental Protection Agency's website for reference to Create Your Own Compost Pile. I decided to go with the 'Backyard Composting Approach Two' from the website.
STEP ONE
KT helped me drill some holes in the bin to help with aeration.

To make sure the compost doesn't smell or attracts pests, I have to make sure the composition is the right balance of brown materials, green materials, water and air.
Brown materials are items that provides carbon to our compost while green materials provide nitrogen. Water is necessary to help break down the materials.
Here is a Compost Info Guide I used for a list of brown materials. I had plenty of newspaper to use so I started with that. Other brown material I would use in the future are leaves, eggshells, and teabags.
STEP TWO
I shredded about six inches of newspaper and put that in the bin first.

STEP THREE
Three inches of green materials and a little soil. I didn't have three inches of green material so there's more soil. For green materials, I have peanut shells, banana peels, laundry lint, strawberry heads... then I threw in rice. That was a mistake. Here on this list from Mother Nature Network of what NOT to put in your compost is rice.

STEP FOUR
Lightly mix the two layers of brown and green materials. I made sure to ONLY lightly mix the newspaper from the bottom because it is important to leave enough loose material at the bottom so that air can flow in from the previously drilled holes. Turning the compost pile regularly will also help distribute air and water.

STEP FIVE
Top the mixture with another three inches of brown material (in my case, newspaper) and moisten with water.

Now I just need to turn the pile every week or so and hopefully, it'll be ready for Spring!


.jpg)
.jpg)
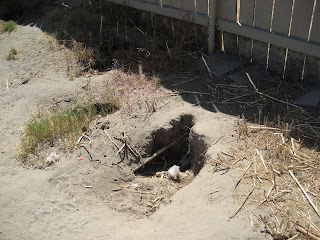.jpg) These are some of the holes that the dogs dug up in the past two years.
These are some of the holes that the dogs dug up in the past two years. .jpg) Section 1 - This is the section to the right of the patio that we'll be concentrating on first. I will post more pictures to show the progress of this area.
Section 1 - This is the section to the right of the patio that we'll be concentrating on first. I will post more pictures to show the progress of this area.